Introducing Prometheus, my very own deep learning arsenal.
An RTX 2070 Super/ Ryzen 7 3700X/ 32 Gb workstation.
- Why own a Deep Learning workstation?
- Should you build your workstation?
- Components
- Cable Management
- Complete Setup Parts List
- Conclusion
“In Greek mythology, Prometheus, meaning “forethought” is a Titan, a culture hero, and a trickster figure who is credited with the creation of humanity from clay, and who defies the gods by stealing fire from Zeus and giving it to humanity. Prometheus is known for his intelligence and as a champion of humankind and also seen as the author of the human arts and sciences generally.”


Why own a Deep Learning workstation?
Today, there is a myriad of cloud GPU options one can use to dabble in the field of deep learning. Over the past year or so, I have used almost all the possible options available which have helped me grasp the concepts of the field as it has made it easy for anyone to prototype the knowledge acquired in the field at an affordable cost. Most of these services also offer free tier options and provide almost immediate access to a GPU instance.
My overall favorite has been Google’s GCP which also provides a 300$ credit to all their users as well as the newly launched Colab Pro which in my opinion is the best value for money option for most DL enthusiasts as it gives you access to multiple GPU instances for a nominal monthly fee. GCP’s main advantage is full command-line access to your Linux based server whereas Colab’s interface is quite intuitive as well. Until recently, I had opted for the Colab Pro for most of my prototyping work and finally renting a GCP instance to train large models on an hourly basis.
This being said, there are still downsides to this setup which becomes way too evident as you start spending long hours with a setup as mentioned above which I’m sure anyone in the field long enough can easily vouch for. Even though gaining access to a GPU instance has become way too easy, here the major frustration points which have bugged me long enough to shell out and invest in building my own DL rig:
- The setup process of getting your instance started with the correct requirements can be quite tedious and takes some time to get a hang of things in each cloud platform available.
- Preemptible instances, which are the free-tier option provided by cloud services can get annoying as you can be kicked off the instance abruptly in the middle of your training process.
- On the other hand, the constant worry to ensure shutting down your device to avoid racking up the bill is real.
In short, having your workstation at hand gives you the much-needed freedom to prototype models at the flick of your fingers and gets rid of all the friction involved in using the cloud options available. This is an extension to James Clear’s advice ‘make it easy’ which is basically to eliminate the friction involved in performing long-term rewarding habits.
“Human behavior follows the Law of Least Effort. Reduce the friction associated with good habits. When friction is low, habits are easy.” ― James Clear
Should you build your workstation?
Due to my lack of experience with hardware components and have not built a PC till now, I was nervous to build my rig without the help of people with experience. There are many dealers and companies that provide services of building DL workstation either as a fixed option or also provide options for customizing your build.
Starting, I was certain that this was the right choice considering that the parts are quite expensive and it’s natural to feel nervous that you might fry a component and thus waste loads of money. So, I started out researching all the components needed to build a decent DL workstation. Here again, I would like to point back to another Tim Dettmer’s blog, A Full Hardware Guide to Deep Learning, which shaped my thought process in building Prometheus.
This was followed by endless hours of watching various PC builds on YouTube and learning more and more about the fascinating hobby of PC building. These hours spent watching people such jaw-dropping builds motivated be so much in wanting to build my PC and the more I saw, the less daunting the whole task seemed. I highly recommend watching builds based on the components you decide specifically by Linus Tech Tips, Jays Two Cents, and BitWit.
If you would like an all-in-one resource to build a PC based on the components needed to build a DL workstation like mine, this is the only one you’ll probably need:
How to Build a PC! Step-by-step by BitWit
In hindsight, I can confidently say that building my PC has been a wonderful learning experience that I am glad I partook in. Despite one’s fears, it is worth pointing out that the process despite seeming pretty intimidating is quite easy if one follows the right guides. The components involved in building the PC are expensive and touted as quite delicate but in all fairness, all the parts available today are quite rugged and one can dispel unnecessary fears of damaging them. Having built the entire system on my own, I have full control over any future expansion plans I have on this build and know exactly what the process is. I’m another in the long line of individuals who would like to take PC building as a valuable hobby.
This being said, If you’re the type of person who doesn’t envy this process and don’t want to deal with the hassle of building your machine, I would suggest checking out Ant-PC in India who provide customizable builds specific to deep learning and also provide on-site warranty and they thoroughly stress test their parts before shipping for an affordable premium cost in comparison.
Components

CPU and Motherboard
- The heart of every workstation depends on these two components and the decision between choosing AMD or Intel would be the main decision that would pave the way for the rest of the components you choose.
- In the last couple of years, AMD has made great strides in overthrowing up Intel off its perch by providing high-performance chips at competitive prices.
- I went with the AMD route and chose the Ryzen 7 3700x card which is probably the best option in terms of performance and cost. It’s an 8 core processor with 12 threads with support for up to 128Gb in memory.
- In terms of the motherboard there are way too many options available in all budget ranges but if you’re going for a premium build then going for an X570 board ensures future-proofing as they support PCIe Gen 4 and come with multiple M.2 slots for super-fast SSD storage options.
- Look for X570 boards that have decent VRM(Voltage Regulated Modules) which is solely responsible for supplying stable voltage to your motherboard.
- The best value proposition X570 board with great VRM’s is the ASUS TUF Gaming X570 option, which was my first choice for my build, but due to the lack of parts available owing to the current global pandemic, I had to increase my budget and go for a higher-end, Aorus X570 Ultra motherboard.
- The Aorus Ultra board has pretty amazing VRM’s, 3 full-capacity PCIe 4 M.2 slots, supports NVIDIA 2 way SLI, Wi-Fi 6, Bluetooth 5.0, and premium Realtek audio. It’s one of the best mid-range X570 boards in the market today and despite the added cost over an ASUS TUF Gaming board, it provides enough expansion and future-proofing for years to come.
Note: Despite the notion among many, an AMD setup supports all the popular deep learning libraries as efficiently as Intel boards.
Storage
- It’s vital to go for an SSD to put your OS on, and ponying up for a good quality M.2 NVME SSD over the older 2.5’ SATA SSD makes a big difference in transfer speed.
- For storage purposes, going for an HDD would make sense.
- I got a 500GB Samsung 970 Evo Plus M.2 NVMe SSD to put Linux on for my main use and a 1 TB 7200 RPM WD Blue HDD for storage and putting on Windows.
- I will look out for deals to add another SSD down the lane for loading Windows on for a faster and smoother experience.
GPU
- Arguably the most important component nowadays in a PC build, it is especially important for my use case since almost all the heavy lifting of training an ML model nowadays is done by it.
- It comprises almost 50% of the overall cost of the build and thus deciding this component is one of the most important aspects to building any deep learning rig.
- My insight into choosing the GPU is heavily shaped by Tim Dettmer’s blog post where he compares the price to performance of the latest NVIDIA cards.
- In the blog post which is a little dated today, he recommends the RTX 2070 as the sweet spot in terms of cost-efficiency and performance. But since the release of the 20 series RTX Super cards which provide much better performance for mot much a difference.
- I opted for the RTX 2070 Super and specifically chose Gigabyte’s RTX 2070 Super Windforce OC, which is highly regarded as one of the best cost-efficient GPU in the market today.
- The recent NVIDIA cards since the 1080Ti offer the possibility of training DL models at half-precision points i.e. allow the possibility of training in FP16 over full precision training at FP32 which has been vital for training large models much quicker and lowering the GPU RAM usage since in theory this type of training doubles the GPU RAM at your disposal.
- I would have loved to opt for the RTX 2080Ti but in all honesty, couldn’t fathom and justify the price difference between the two. I have developed my build in such a way that it can support multiple GPU systems, so maybe down the road ;).
Power Supply
- Choosing a PSU is pretty straightforward, just lookout for a decent brand and ensure that you have bought a PSU that manages to adequately supply all the components you have and would like to have in the future.
- To keep an expansion possibility of adding another GPU, I went for an Antec HCP 1000W PSU, which is a fully modular power supply with an 80+ platinum rating with decently premium black sleeved cables.
- For setups with a single GPU, a 750W PSU is more than sufficient but it’s worth ensuring that the PSU is either 80+ gold rated for reliable power supply to your PC.
RAM
- When choosing a RAM, the main criteria to ensure is to have enough RAM to perform your prototyping smoothly. The clock speeds and latency aren’t as important.
- For Intel processors, one could easily go for lower RAM speeds but AMD suggests users go for higher clock rates, ideally above 3200Mhz.
- One should also go for a dual-channel or quad-channel setup to achieve ideal performance.
- I decided to go for a dual-channel, G.Skill Trident RGB 16*2 3200Mhz RAM bundle.
Note: Manufacturers make RAM sticks optimized specifically for either an Intel or AMD or both and it’s worth checking it out but as far as I know they don’t make as much difference in performance.
CPU Cooler
- The hotly contested question that exists for CPU cooling is between air cooling and water cooling.
- It’s well-founded that a good beefy Air Cooler can provide as good or even better cooling performance for a much cheaper cost at the expense of fan noise.
- An AIO(All-in-one) cooler does provide the advantage of being much quieter as well as adds the aesthetics factor.
- In my initial build, I used the stock cooler AMD Prism cooler but then succumbed to the urge of adding more RGB and aesthetics to my build and opted to buy the NZXT Kraken X63 cooler.


- It’s worth noting that an AIO is the hardest component to fix due to the work needed in orienting it and getting the bracket right.
- Do ensure to get the latest AM4 bracket if going for an AMD build as they are more secure, this was what was missing in the initial X62 AIO I ordered at first but later exchanged it for the later X63 model which was the same cost as the predecessor.
Cabinet/ Case
- Choosing a case/cabinet is a matter of preference at the end of the day.
- Ensure that your case has decent airflow reviews which would be needed to keep your components at an ideal temperature and supports your expansion needs.
- I wanted to get the Phanteks P400 Digital or Fractal Meshify C which has one of the best airflow’s at a decent cost but due to lack of availability with the NZXT 510i which is the great minimal looking case and provides a superb building experience.
- The NZXT 510i lacks a front mesh and is thus less optimal in maintaining temperatures when compared to both my initial picks but is surely an eye-catching minimal case with great cable management, RGB capabilities, and newer-IO ports to make up for.
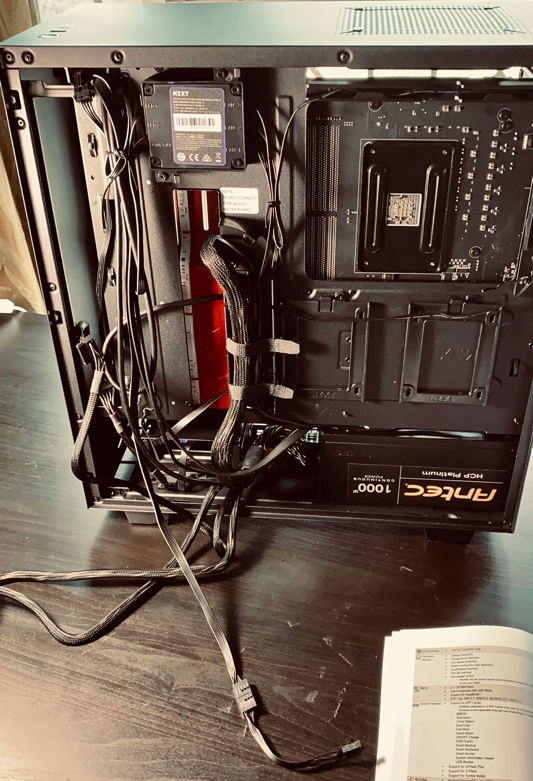
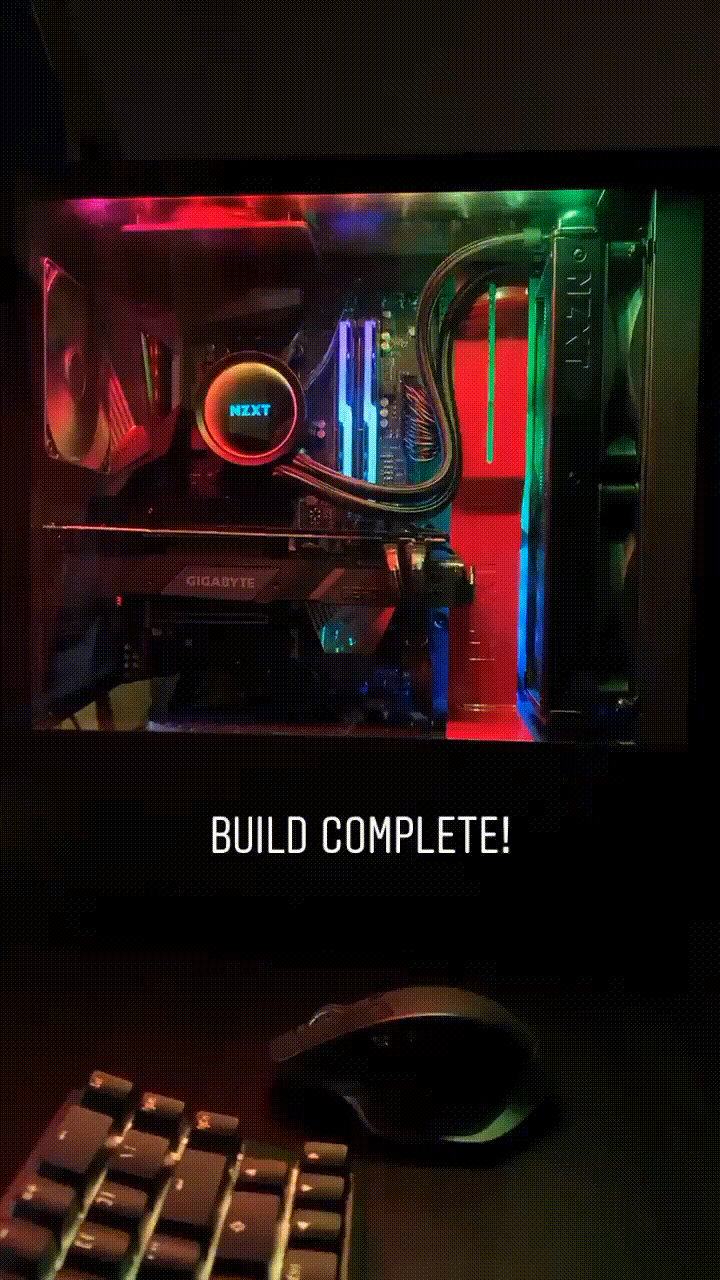
Cable Management
- Cable management is hands down the most time-consuming and frustrating task in a build especially if you’re obsessed like me in getting things to look right.
- Taking a piece of paper and plotting the wire path helps greatly in the process along with cable ties, velcro wraps, and tape.
Before:

After:


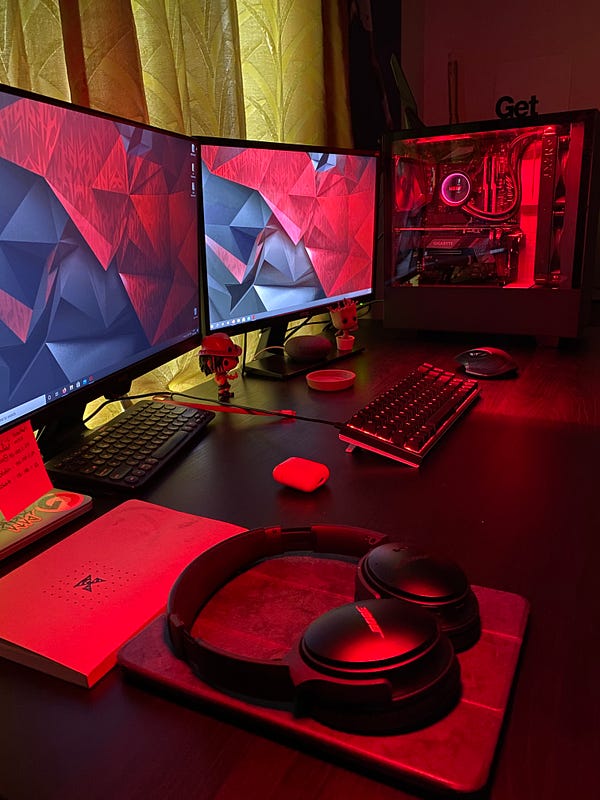
Complete Setup Parts List
- CPU: AMD Ryzen 7 3700x
- Motherboard: Gigabyte Aorus X570 Ultra
- GPU: Gigabyte NVIDIA RTX 2070 Super Windforce OC
- RAM: G.Skill Trident RGB 3200Mhz C16 * 2
- CPU Cooler: NZXT Kraken X63
- Case: NZXT 510i
- PSU: Antec HCP 1000W
- Monitor: BenQ GW2480 1080p 60Hz Monitor * 2
- Mouse: Logitech MX Master 2S
- Keyboard: Ducky One 2 SF Mechanical Keyboard
Conclusion
All in all, building my own workstation from the ground up has been an amazing learning experience and is definitely something I would wholesomely suggest it to anyone interested in pursuing a career in data science. There’s definitely a learning curve to get a grip of things but once you get past that it becomes very clear as to why PC building is such a popular hobby for people all over the world. The path of curiosity and desire to learn all there is to learn about PC building to getting the parts and building your own system and seeing a successful post screen is definitely an invaluable experience to cherish!
By having a powerful workstation on hand has definitely made it very easy to prototype quickly without having to run through the hoops of setting the necessary requirements for your work, since that’s just a one-time process.
I’ll be following up this blog with another blog post detailing my setup process of getting all the necessary ML libraries installed, stress testing/ bench-marking my setup and setting up a remote server workstation.

Feel free to reach out to me regarding my work, to collaborate on ML projects or just discuss ML in general on my Twitter handle.
Stay safe and happy learning! :)